GenICam GenTL Driver
GenICam is an industry standard for controlling and acquiring data from an imaging device.
The included GenTL driver allows GenICam-compliant third-party software applications such as Halcon and Common Vision Blox to acquire and process 3D data and intensity generated from the sensor.
The following sensor scan modes are supported:
- Video
- Profile (with Uniform Spacing disabled). In this mode, the raw profiles are resampled and accumulated into a surface.
- Surface (with Uniform Spacing enabled)
For more information on scan modes and uniform spacing, see Scan Modes.

|
To use these third-party software applications, you must configure a system variable so the software can access the GenTL driver. For instructions, see To configure system variables to use the driver in Windows 7, below. |
To get the utilities package containing the driver (14405-x.x.x.x_SOFTWARE_GO_Utilities.zip), go to https://downloads.lmi3d.com/, choose your product from the Product Downloads section, and download it from the Download Center.
After downloading the package and unzipping the file to a location you will remember, you will find the driver in the GenTL\x86 or GenTL\x64 subfolder under Integration > GenTL (you can move the GenTL folder to a more convenient location).
To configure system variables to use the driver in Windows 7:
| 1. | From the Start menu, open the Control panel and then click System and Security. |
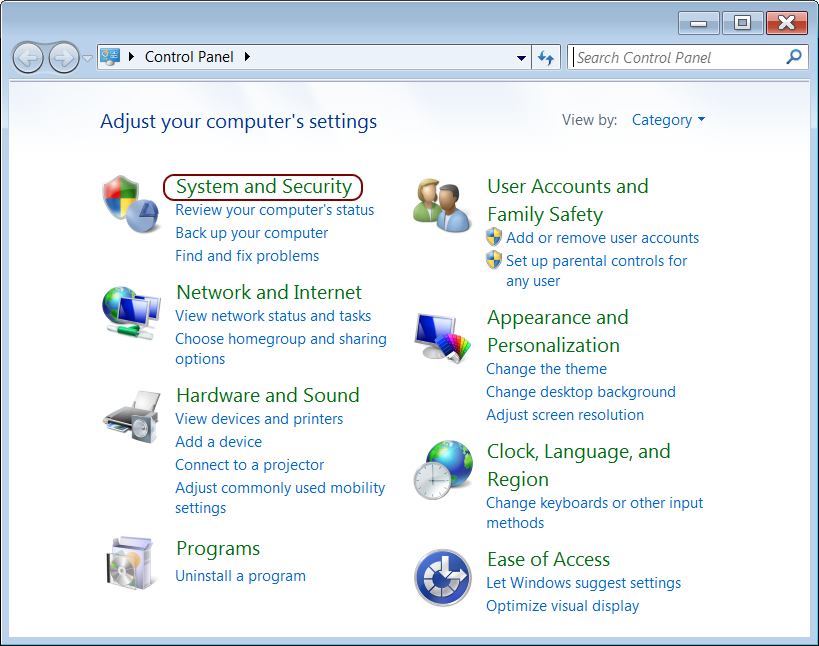
| 2. | Click System. |
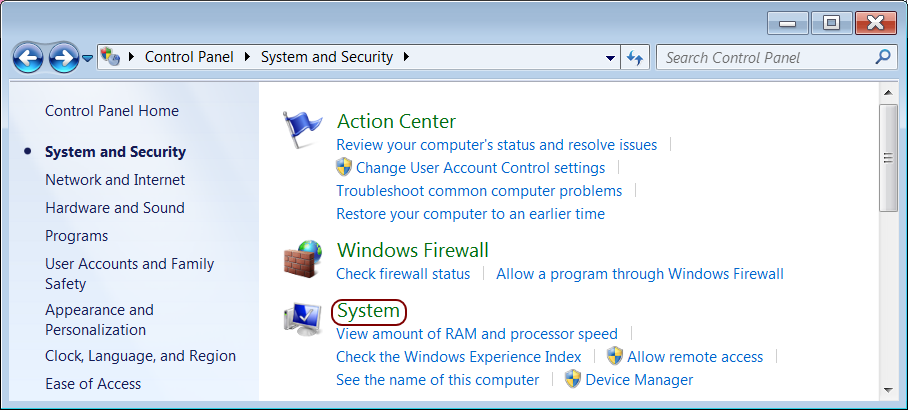
| 3. | Click Advanced System Settings. |
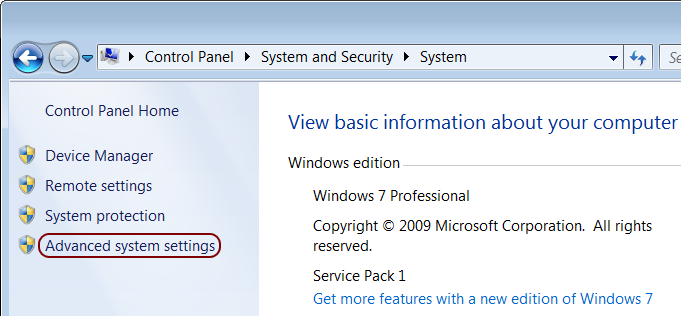
| 4. | In the System Properties dialog, on the Advanced tab, click Environment Variables... |
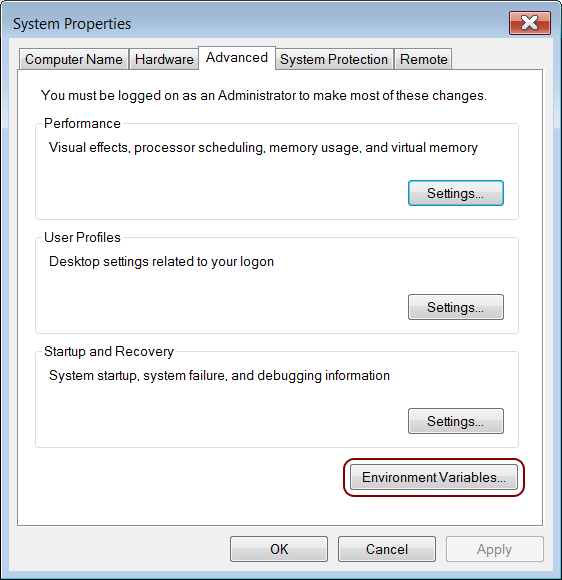
| 5. | In the Environment Variables dialog, under the System variables list, click New. |
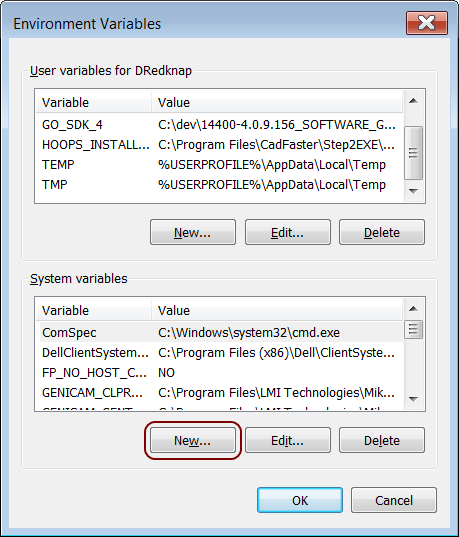
| 6. | In the New System Variable dialog, enter the following information, depending on your system: |
| Variable name | Variable value | |
|---|---|---|
| 32-bit system | GENICAM_GENTL32_PATH | The full path to the GenTL\x86 folder. |
| 64-bit system | GENICAM_GENTL64_PATH | The full path to the GenTL\x64 folder. |
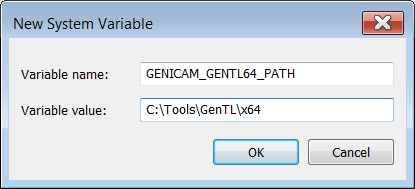
| 7. | Click OK in the dialogs until they are all closed. |
To work with the GenTL driver, the sensor must operate with the appropriate output enabled in the Ethernet panel in the Output page. Check Acquire Intensity in the Scan Mode panel on the Scan page and enable intensity output in the Ethernet panel if intensity data is required.
The GenTL driver packs the output, intensity, and stamps (e.g., time stamp, encoder index, etc.) into either a 16-bit RGB image or a 16-bit grey scale image. You can select the format in the Go2GenTL.xml setting file.
The width and height of the 16-bit RGB or grey scale image is calculated from the maximum number of columns and rows needed to accommodate the sensor's field of view and the maximum part length.